In the past few years, flower farming has seen a distinct boom in the U.S. While there used to be relatively few sources you could go to if you were wanting to go into growing cut flowers for profit, there are now more than you could ever read / watch / follow in a lifetime. However, I have found relatively few sources that give actual hard and fast numbers for what it costs to START one (although occasionally you’ll get a ballpark figure–I’ve seen some saying as little as around $600 and some saying $20,000+). Obviously there will be variability with the figures depending on the size of your farm, if you decide to invest in some higher-cost infrastructure (aka, high tunnels or a greenhouse), where your farm is located, etc.
Related Post: How to Start a Microscale Flower Farm for around $200
Therefore, I can’t tell you exactly how much YOU would need to start a flower farm of your own, but I CAN tell you what it cost to start mine, which will hopefully give you a pretty good idea of the start-up costs in case you’re thinking of going into this on your own.
A few things to keep in mind:
1 – The figures below only indicate the SUPPLIES we bought—they don’t take into account the money spent on transportation, the MANY hours of labor, or the cost of watering the flowers using irrigation and culinary water sources.
2 – We started our farm this year (in 2021) in Central Utah. While we sourced many of our supplies from online sources (and therefore the prices would be similar across the nation), some of them will be based on what we found locally, such as all the filler for the raised beds that we bought from our local IFA.
3 – We did not go into debt to start this farm. We largely used money from stimulus checks, our tax return, and income from the farm itself to fund this year’s expenses, so these start-up costs aren’t things we’re going to be paying off for years. If you go into debt to start a farm, you have to keep in mind the interest you’ll be paying over time as part of your cost.
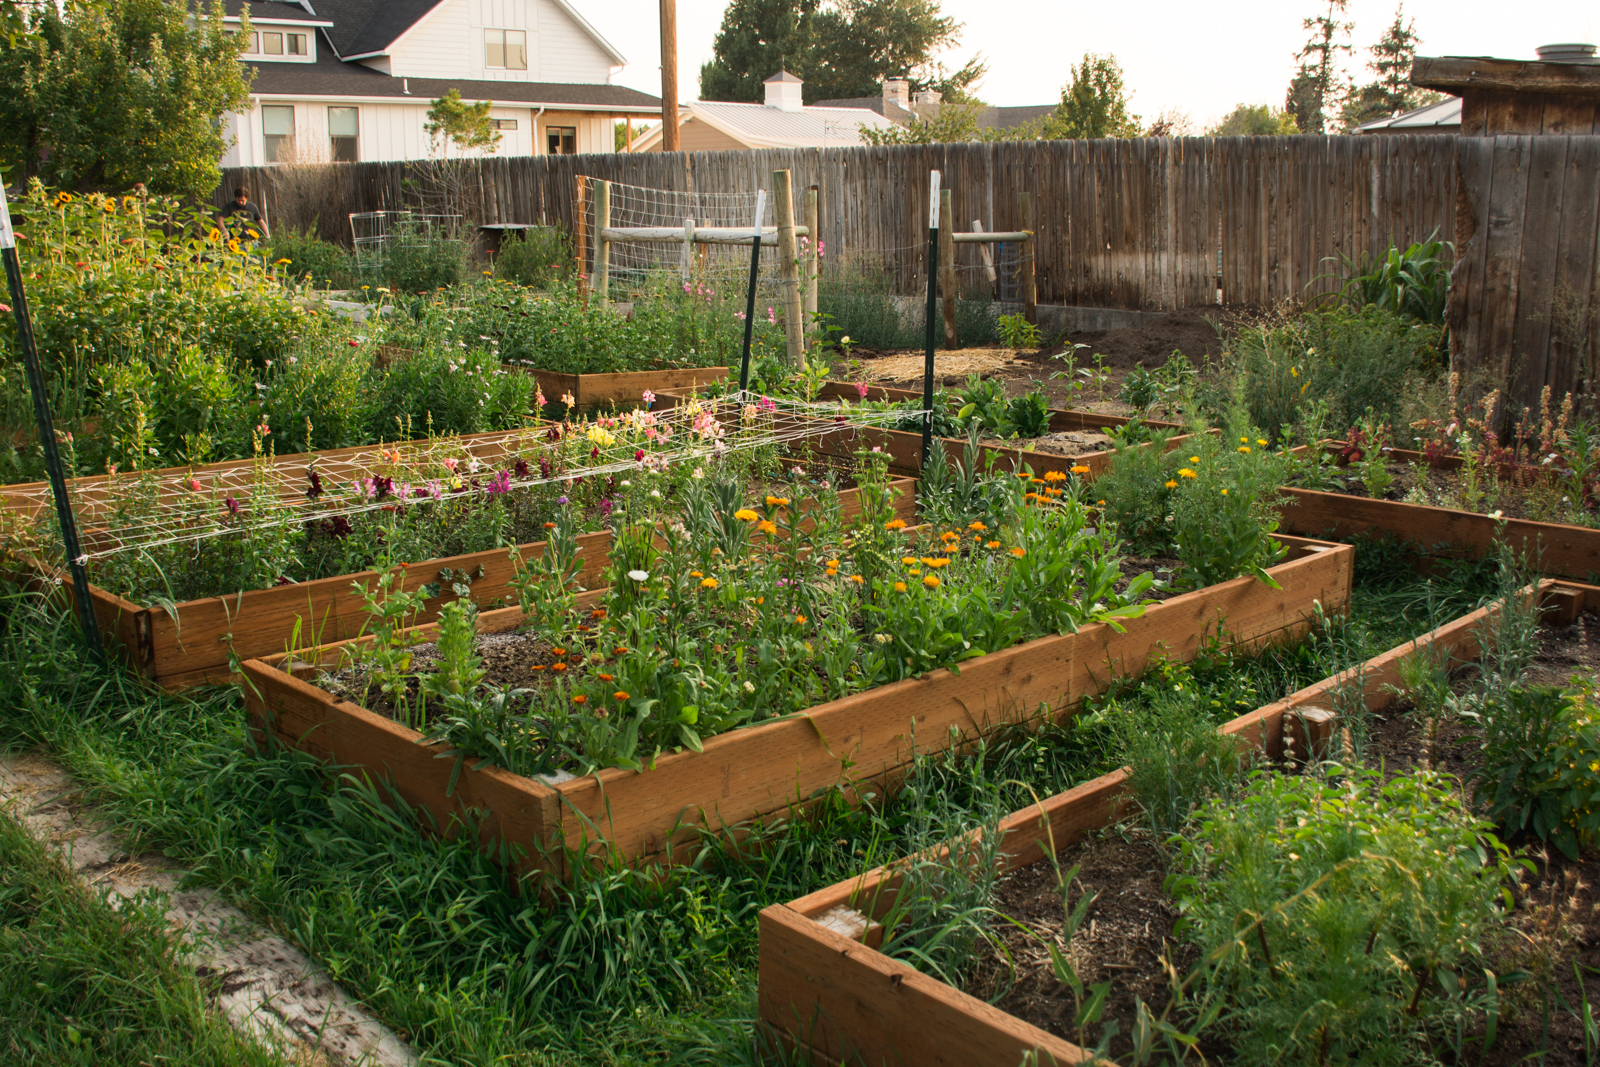
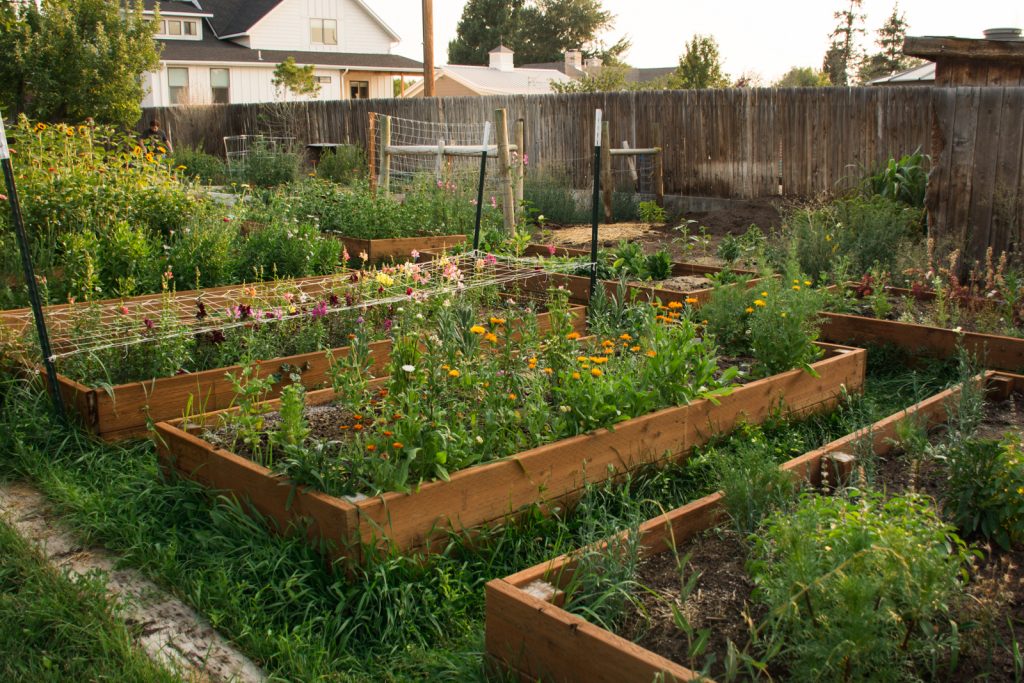
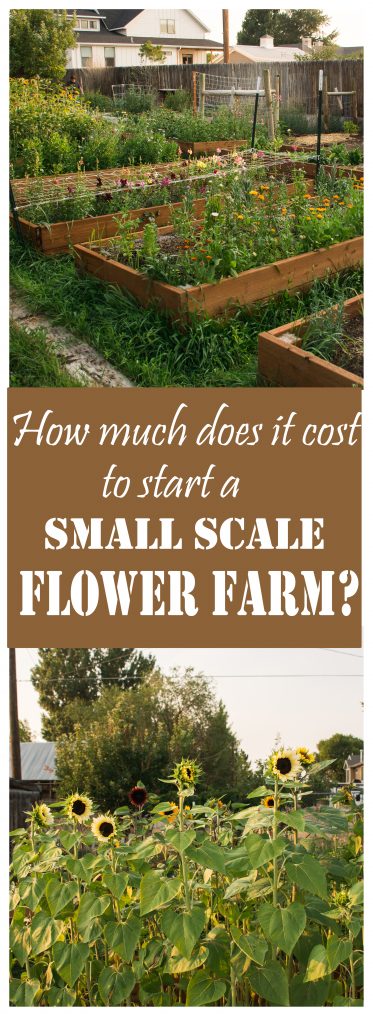
4 – Our farm/home is located on just over a half acre of land, only a small portion of which we’re actually using for flower production this first year–around 1,100 square feet is all (though we’ve almost quadrupled the size of our flower farm for next year). As we wanted to make sure this was a viable business before investing *too* much, we decided not to build any structures (such as high tunnels or greenhouses) this first year, though we are planning on putting in an inexpensive version of a high tunnel next year. For this first year, we decided to have about two-thirds of our flowers directly in the ground and the other third in raised beds. While the raised beds are a significant portion of our start-up costs, they were worth the investment for me because I’ve had back issues for years, and raised beds are FAR easier to stay on top of than any planting done straight in the ground, plus you have complete control over the soil.
5 – If I were to go back and do it all again, I would pull back my spending in some areas and invest more of the money into time-saving infrastructure elements like drip irrigation tape and weed fabric. In future years, these will be top of the list! I also couldn’t have known this at the beginning, but we bought quite a few things that we didn’t really need — they were just things that had come recommended by others, but which didn’t really fit into our particular business plan at this time (such as many of the floral supplies and tools).
6 – For ease of calculation, I’ve rounded everything to the nearest dollar.
Note: There are affiliate links to products mentioned below, which means I may get a small commission on any purchases made through these links at no extra cost to you.
Seeds + Plants
This is the most obvious category of things you’d have to buy, so I’ll start with it first (plus it’s the one you get the most excited about!). In almost every case, it’s cheaper to buy seeds and start your flowers that way than to buy them as established plants or even as plugs (which are seedlings grown by other farmers/nurseries for you). This year, I bought almost all of my seeds from three main sources: Baker Creek Heirloom Seeds, Floret Flower Farm, and Johnny Seeds.
To save myself on shipping costs, I should have planned out my year better and ordered everything all at once in one bulk order rather than splitting it into several different orders. Baker Creek does free shipping no matter the minimum, but Johnny’s requires a minimum order of $200 for free shipping, which meant that my shipping costs really added up because I didn’t just group them together. I also found that the more economical option for specialized varieties was often through Johnny’s, since you can order by the ounce there rather than just have to go with the preset amount that’s in each packet.
I was able to source some bulbs and plants locally through Walmart (which is the only big store around here) and from a couple different nurseries we visited in other counties throughout the growing season, and I bought a few other things online from Breck’s (lilies, roses, and hellebores) and Home Depot (peonies) for this first season.
Since flower farmers always have to plan ahead, I’m also including the cost of all the fall bulbs I bought for NEXT year, which I had to order mostly in May and June to be sure to get what I wanted. As those are all part of the costs of starting the farm this first year, I’m including them here. I made a large order of bulbs through Dutch Grown (500 tulips, 100 alliums, 100 daffodils) before I realized that I could qualify for better prices through a wholesaler, so I also bought bulbs from A.D.R. Bulbs once I qualified for their wholesaler program. From ADR, I ordered yet more tulips, alliums, and daffodils, and I also got ranunculus corms, leucojum, and hyacinths from them too. All in all, we purchased around 2,500 bulbs this year, which will all come up next spring.
I am not, however, counting the cost of my bulk seed order for next year (although I’ve already paid for them). If I could have planned better, I would have planted bulbs in the fall BEFORE we ever started the flower farm, so all of those would have been included in my first year’s costs of starting the farm, which is why I’m including the cost of the bulbs.
Although I bought way too many seeds this year to use them all (and will therefore be saving some for next season), I anticipate that seeds and plants are a recurring expense that I’ll have to plan for each year. (Let’s be honest though — this is one expense I’m happy to take on! Buying the seeds and plants and bulbs is the best part!)
$1,124 (seeds + plants) + $1,072 (fall-planted bulbs)
Total Amount Spent on Seeds, Plants + Bulbs: $2,196
Seed-Starting Supplies
Because we started so much of what we’re growing this year from seed, we definitely needed to improve upon the sad little seed set-up we had before, which was one small grow light and one seed starting tray. We started out by buying 6 of these highly-rated (and decently affordable) grow lights from Amazon, but it quickly became apparent that we’d need to at least double that, so we ended up with 12. We also figured out that it would be best to have a few heat mats to both speed up germination and to provide heat to the plants that preferred a warmer temperature, so we got four of these.
Update: I’ve since tried out these less expensive shop lights for our grow light setup, and they work just as well as the ones listed above, but at a fraction of the cost. I will only be going with these from now on, most likely.
We also needed various seed starting trays, domes, etc., and we tried several different types this year to see what we liked. We ordered ten of these 72-cell trays, which are a great size but that I wish would have come with the bottom tray for catching water and a humidity dome. These 40-cell half trays came with all three components and were a great size for most of our seeds to not just start in but to grow on a bit in as well, so we purchased quite a few of those. However, I learned from firsthand experience this year that some plants are simply too big for the 40-cell half trays (which are roughly equivalent in size to a typical 72-cell tray), so I ended up splurging a bit and getting a ten-pack of some larger 6-cell mini trays (which also included the dome and the bottom watering tray).
We ended up deciding to try a seedling sale this year as well, which meant that we needed to purchase a bunch of larger individual pots to size up the plants as they got bigger (and then to eventually sell the seedlings in). We ended up trying several different options, including two different sizes that were biodegradable and two that were not. All worked fine, though I will say that the biodegradable ones sure didn’t biodegrade as quickly as I would have liked, probably because we are farming in an extremely dry climate and I’m not sure my watering (as frequent as it was) was heavy enough most of the time to really aid the breakdown process.
Finally, we needed seed starter mix. While you can buy soilless seed starting mixes, we actually opted to make our own since it was the more economical option on as large of a scale as we were doing it. Basically, we just mixed together equal parts coco coir, perlite, and vermiculite, and that was it! (Though I will say that when I potted things up to a bigger size for the seedling sale, I increased the ratio of coco coir in the mix.)
Total Cost of Seed-Starting Supplies: $1,083
Soil, Mulch, Fertilizer
In past years, I’ve just tried to go for the cheapest option when it came to our soil, which meant getting loads of green waste compost from the local dump. Some years, this worked to our advantage. Other years, we got a bad batch that was still too “hot” for the plants, and it killed most everything we put in it.
Even though I would much rather spend my money on seeds and plants (because duh), I realize that the soil I’m putting those seeds and plants into is the single most important factor in my success, other than weather.
So even though I still tried to save costs where I could, I tried not to skimp too much and to “do it right,” or at least as right as I could. Going forward, I found a much less expensive source for high quality aged manure compost from a local goat and horse rancher, so I’ll be using that from now on.
I started first off with sending in a soil sample to get a soil analysis done on the biggest in-garden bed we’d be planting. Looking back, I should have sent off soil samples from ALL of our in-ground beds, but even just doing the one was very helpful. The bed had formerly been a cow corral and still had some manure that hadn’t broken down, which meant that the soil was far too salty for anything to thrive in without us doing some serious salt leeching through copious watering. Had I not sent in the soil sample, I would have just planted it to see what happened, and I would have lost every last thing. As it was, we still lost several things due to the soil still being high in salt even after leeching, but we also had some things that did okay.
While the former cow pasture didn’t need any amendments other than watering to get the salts out, I knew the other in-ground beds needed some good compost because I could tell they didn’t have much — if any — organic matter in them just by looking at them. We found a local landscaping company who sold loads of compost by the dump truck load, and we got two loads of two different kinds of compost and soil from them. The straight compost we put on top of all the existing in-ground beds and put a layer on top of all our raised beds we built at the beginning, and for the soil mix we ordered later, we used that on the new in-ground beds we tilled up and in the later raised beds we built. Looking back, we probably should have just ordered the soil mixture from the get-go and used it on all the raised beds instead of the strategy we used below, but hindsight is 20/20.
For the soil in our raised beds, we used what’s called the lasagna method in order to try and cut down on costs. Basically, that meant we just put cardboard and newspaper at the bottom, did a layer of alfalfa hay, then a layer of straw, and then a layer of soil, and then a layer of compost on top. The soil we bought by the bag at our local IFA, but looking back, I think it would have been much more cost effective to order more of the soil mixture from the landscaping company and use that for the beds. I might have still done a small layer of straw on the bottom, but I didn’t love the method — I don’t think we did our soil layer thick enough since the straw poked through in some areas after the season went on, and the whole soil level sunk a LOT by the end.
We’re choosing not to use any chemicals on our farm, so all our fertilizers are derived from natural sources. We used liquid fish emulsion on a weekly or semi-weekly basis for the first several weeks while the seedlings were getting established after transplanting; we used yucca extract on the beds that had a high salt content (like the former cow corral) in order to help leech out that salt and help the plants take up more water; and we used a marine cuisine dry fertilizer in some of the raised beds and in some of the seedlings we had to pot up to act as a slow release fertilizer.
Total Cost of Soil, Mulch + Fertilizer = $1,576

Raised Beds
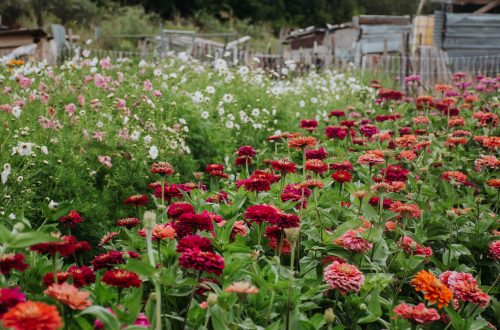
In order to control the soil and to make weeding and upkeep easier, we decided to build 9 raised beds this first as part of the flower farm, which is where we grew the majority of what we ended up selling.
Our raised beds were 4′ x 10′, and 16″ high. We used pressure-treated lumber and wood deck screws.
Lumber prices were insane this year, so the cost on these was definitely higher than what we’d paid in the past for the same size bed.
Cost of Materials for Raised Beds: $1,663
Plant Support (Hoops, Frost Cloth, Netting)
While I didn’t use plant support as much as I SHOULD have, I did use it sometimes.
Eventually I’ll probably invest in more durable/expensive hoops and frost cloth, but for this year, I went the inexpensive route and tried out two sets of hoops (I liked these ones better), and this frost cloth (which is not durable at all — quite a few got large tears in them). I used this netting, but I didn’t love it — it tangled super easily and was kind of a pain to get situated, but maybe all netting is like that.
I’ll admit that I netted very few of my crops, though I really should have netted more. Most things generally didn’t get tall enough for me this year to worry too much about supporting them (especially considering that we had almost zero rainstorms the whole season), but I do wish I would have netted my scabiosa, as it got way too tall and wiry to support itself and flopped over in one massive heap in late summer.
Cost of Plant Supports: $154
Garden + Harvest Tools
While we had a decent number of garden tools already, we still needed some specialized things for growing on a larger scale. In addition to needing to spend a bit of money on some of the more “usual” garden tools like a gardening hat, tomato cages and a metal rake, we also needed to buy several 5 gallon buckets for harvesting, sharp harvesting shears (these are my favorite), and heavy-duty harvesting gloves.
To expand the farm in the fall, we also invested in a heavy-duty silage tarp, as well as an electric tiller, both of which allowed us to kill off large sections of what had formerly just been lawn and convert them to garden beds. We also decided to invest in a backpack sprayer so that we could fertilize large areas more quickly with fish emulsion, and we also bought a specialized hose nozzle for watering seedlings.
Other random expenses included head lamps so we could work when it was dark (which happened more often than you’d think) and special auger drill bits for drilling holes to plant bulbs.
Total Cost of Garden + Harvest Tools: $529
Floral/Bouquet Arranging Tools
Here’s an area that I definitely overspent in — I basically just looked at Floret’s Cut Flower Garden book and bought nearly every single thing she mentioned in the “floral tools and supplies” section. However, as I was a bit of a one-trick pony this year and mostly just stuck with doing hand-tied market bouquets, I didn’t need anything like chicken wire, floral frogs, etc. I also bought a LOT of thrifted vases (and got probably well over a dozen for free from other sources), only some of which have ended up actually being useful thus far.
Down the road, I might get a lot more into the “floristry” side of the business and utilize all these things, but for this year, I really didn’t need so many.
For those starting out, I recommend a few different sizes of vases so you can get a sense of how it is to work with each (I usually preferred the ones that flared out at the top a bit), some good floral snips, and floral preservative for sure, especially as you’ll want to give a packet with each arrangement or bouquet you sell.
The mainstays for me in this category ended up being brown kraft paper, rubber bands, and ribbon. Later in the season, I cut down on how much ribbon I was using and only used it in mason jar arrangements (instead of around each hand-tied market bouquet), but it did give a nice finishing touch whenever I used it. I also substituted the more inexpensive twine on occasion as well, which looks nice too.
Lastly, I thought I was going to be selling to florists as part of my business plan, so I ended up getting quite a few different sizes of floral plastic sleeves in case I needed to bundle up stems and sell them in groups of 10 like that. While I didn’t do that this year, I am planning on having such an abundance of certain crops next year (mostly lilies and ranunculuses) that I do anticipate those will eventually come in handy.
Total Cost of Floral + Bouquet Supplies: $476
Business Expenses
This category included all kinds of things, such as advertising on social media (we spent around $110 total throughout the season), the cost of setting up the business as an LLC, a membership to my state’s cut flower farm association, and more.
It also included the more expected expenses of purchasing a card reader to take payments, postage to mail out business correspondence, and business stickers. I didn’t order business cards this year because I didn’t think people really used them anymore, but that was a huge, huge mistake. Those are definitely at the top of the list of things to buy next year for this category.
I also counted our expenses for selling at the farmer’s market in this category, which meant buying a shade canopy, folding tables, and a magnetic tile board to display prices.
Total Cost of Business Expenses: $1,004
Books + Research
While you can find quite a lot of information for free online, I found that often the way to get the most important information in the most concise way (and without having to sift through a lot of unnecessary advice) was just to buy some books on the subject.
Now, after buying *quite* a few books this first season, I can say with certainty that really only about a handful have been extremely useful (while the others have just been eye candy). I plan to do a later post on my favorite books on cut flower farming and flower arranging, but for a few that I couldn’t live without, you can check out these: 1 / 2 / 3 / 4 / 5
Total Spent on Books + Research: $501
Grand Total: $9,182
Now, in all reality, we could have gotten by with spending less–there were some things we purchased that we later realized we didn’t really need (like much of the floral arranging tools), and considering that I only regularly refer to a handful of the gardening books (yet bought probably between 15-20), I could have cut down there as well.
On the other hand, there were also areas that we were able to save money by shopping around, picking things up from estate sales (like ribbon), or getting them for free (such as many of our vases).
All told, is it possible to spend less than this to start a small-scale flower farm? Absolutely. However, I CAN almost guarantee that it will cost much, much more than you think it will, just because there are so many “invisible costs” that are easy to overlook.
I hope you found this useful, and please, don’t hesitate to share, pin it for later, or comment below with any questions you have!


Thank you for all the information! I’ve been wanting to have a flower farm for years and I think I’m working up enough courage to start small next year to do small sales. You were very concise and helpful with all this information! 🙂
I’m so glad you found it useful, Olivia! Best of luck to you on your flower farming adventure — it’s so much work, but really rewarding 🙂
Fabulous article! So full of details details! Thank you so much! I’ll reread and check out links this time. Exploring flower farming as a possibility right now. And the idea gets sweeter and sweeter. 🙂 Your information has been super helpful! Best!
I’m glad you’re finding the info useful! It’s the kind of thing I wish I would have had access to when I was considering starting up ours. If there’s anything in particular you’d like me to post about, let me know!
What a great idea! Did you end up breaking even at least for your first year of flower gardening? What was your favorite book you purchased?
My first year? Not even close! I made back less than half of what I paid in. However, my second season I did make a small profit, and my third year should be much more since I don’t have any big investments I’m planning for this coming season.
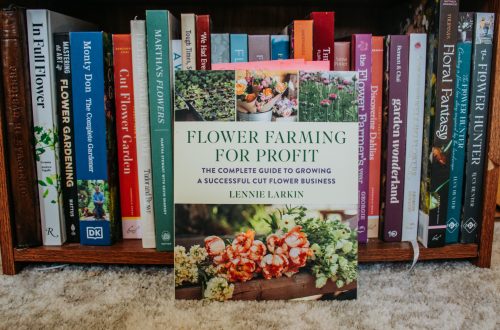
I own probably around 40 flower farming and floral design books, but by far the two I reference the most and say are absolute must-owns are:
– Cut Flower Garden by Erin Benzakein https://amzn.to/3kmzYtB
– Cool Flowers by Lisa Mason Ziegler https://amzn.to/3HlEdP7
I used your info from the article to form a loose basis for a class project on startup costs of an urban flower farm. I really appreciate the energy you put into this info!
-J
Glad it was useful! Hope your project went well 🙂