

When you first get into flower farming or cut flower growing, you quickly realize that you almost surely are going to need to learn how to start your own plants from seed. Not only is it more economical (at least at first) to start your own seeds, but sometimes logistically, it’s one of the only ways to get the specialty kinds of plants you need for cutting.
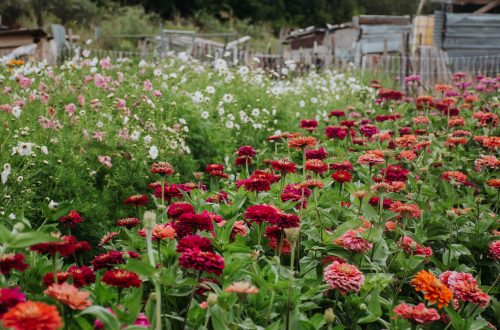
For example, where we live, there are only a couple places nearby where you can buy plants at all — our local Walmart (the only chain grocery store we have in our whole county), the IFA across town from that, and a small local nursery run by a family that lives a few blocks away from us. While some of those places will sometimes offer some things commonly grown for cutting (like zinnias or marigolds), they rarely offer the varieties that have been specially bred for height, strong stems, longer vase life, etc. So basically, if you want the best cut flower varieties that are currently on the market, you only have a couple options: 1) you can learn to grow them yourself, or 2) you can find someone else to grow them for you (like a company that specializes in growing plugs).
Starting your own is by far the most economical option when you’re starting out, and the good news is that it’s almost surely not as difficult as you’ve probably made it out to be in your head. The key to success with growing your own seedlings comes down much more to your ability to form good habits than in the amount you’ve spent on a fancy setup and equipment.
But let’s start with the basics.
You need the following to be able to grow your own seedlings:
- seeds (duh)
- growing medium (aka, something soil-like to grow the seeds in)
- seed trays (aka, something to plant the seeds into)
- water
- light
- heat (not always strictly necessary, but it will help enormously)
I’ll break down each of these things one by one below.
Note: There are affiliate links to some of the products mentioned below.

Seed-Starting Equipment
Seeds
As a general rule, the top thing your seed variety needs to have is the necessary height in order to work as a cut flower. When you’re first starting out, it’s super tempting to just look at the picture, swoon over how pretty it is, then add it to your cart without actually stopping to consider if that variety will be good for cutting. Do yourself a favor and make sure you check every seed variety to verify that it has a MINIMUM mature height of 18″. For what seeds I particularly recommend for beginners just starting out (all of which make great material for bouquets and are relatively easy to grow), check out this post.
But for now, just make sure you have some good quality seeds in hand (my favorites come from Johnny’s, Floret, or Baker Creek) and that they all have a good height on them.
Growing Medium
In general, you need some kind of soil-like medium to grow your seeds in unless you’re growing them using hydroponics, which I’m not going to get into here. The most common two types are seed starting mix and potting mix.
Seed starting mixes tend to be finer and lighter than potting soils, with the end result that germination rates tend to be higher. The purpose of a seed starting mix is mainly just to germinate the seeds and get them going, not to sustain them for long periods of time. A potting mix is generally denser and has more nutrients built into it. As such, you might have slightly lower germination rates, but you will be able to essentially “grow on” the seedlings in that same mix, and the seedlings tend to be more robust since they have more “food” built into their soil to draw from regularly.
I’ve used both kinds and have had success with both, as long as some basic rules are followed. I used to make my own seed starting mix by mixing equal amounts of coco coir, perlite, and vermiculite. Since there wasn’t any “food” or “nutrition” in the mix, I also had to fertilize weekly (my top choice was/is fish emulsion). As a cost effective option for seed sowing in bulk, this setup worked great and was highly economical.
However, I now find that for me, it makes more sense time-wise and for the long-term success of my seedlings to fill the seed tray cells with a high quality organic potting soil and then just put a very fine layer of seed starting mix (or straight vermiculite) on top. This means that I get the best of both worlds — super high germination AND enough nutrients and density in the potting soil that I don’t have to fertilize every week in order to have robust seedlings.
For the record, my current favorite organic potting soil that I use for all seed starting is THIS.
Seedling Trays
To grow seeds, you need to have some kind of basic containers to plant them in (unless you choose to go the soil blocking route, which I’m not going to cover here). You can go super cheap and punch drainage holes in plastic yogurt cups or something similar, or you can buy kits where everything you need is already included. Since we’re growing on such a large scale, buying tray kits made sense for us. I personally like the trays that include the actual seed starting cell tray, the bottom tray (for catching the water that drains out the bottom), and a see-through germination dome.
You can get various sizes, but my favorite two are this 40-cell one for stuff that tends to grow a little slower and doesn’t tend to get as large (like snapdragons) and this 24-cell one for things that grow quickly and get bigger (like zinnias). Both kinds are considered a half tray size, which means you could fit two per heat mat, which I’ll talk more about below.
Water
Obviously, your seedlings are going to need to be watered on a regular basis in order to survive. For me, I use a basic water pitcher and I bottom water my seedlings (meaning that I lift up the top tray with the actual seed starting cells and pour a little less than an inch of water directly into the bottom tray and let the cells soak up the water from underneath). I set an alarm on my phone to check my seedlings every morning, and I use visual cues and other observations to see if my seedlings need to be watered that day. Since overwatering is just as bad for seedlings as underwatering, you should know that you usually don’t need to water every day, especially at the beginning.

Lights
While some people can get away with growing seedlings by a sunny window, that setup has never worked well for me since it tends to result in weak, leggy seedlings that are stressed out from constantly having to reach out for their light source. My preference has been to buy lights that I string up and keep about 3-4 inches higher than the tallest seedling in the tray. This ensures that my seedlings are stronger and less spindly and that they also tend to be more upright rather than constantly leaning towards wherever the light is coming from.
At first, I spent a ton of money on these more expensive grow lights (which work fine), and then I tried out these cheap shop lights to see if there was any difference. At least for me, my seedlings have performed identically under both types of lights, so I just save my money and go for the cheap shop lights now.
Heat Mat
To get faster and better germination rates, I highly recommend investing in a heat mat (or three). You only put your seedling trays on the heat mat when you’re trying to germinate them (that’s also when you use your see-through germination dome, FYI), and then you take them off the heat mat. I find that this gives me fabulous germination rates (as long as my seed is fresh) and that it also greatly cuts down on the amount of time I need to wait for the seeds to sprout. You can find the exact heat mat I use right here, and you can fit two of the half trays I mentioned above on each one (or one full tray, if you end up getting a bigger size).

Putting it All Together
For us, the easiest way to actually put all these components together was to utilize some existing wood shelving in our basement, as well as the open wood beams running across the ceiling. Since most of the grow lights we purchased came with some hardware and wire for hanging, we just invested in some cheap hooks (that we screwed into the tops of the wood shelves for the lights on those) and some heavy twine (that we looped over the exposed beams in our basement to secure the lights that would go over a cheap folding table).
The shelves provided the easiest way to get going, but if you have an exposed beam setup like we did, you can’t go much cheaper than just to let the lights hang freely by looping them over the beams with twine and hanging them a few inches above a cheap folding table.
Hopefully that all made sense, and as always, if you have any questions, I’m happy to answer them! Just leave me a comment below.